Good morning my little SAUSAGE & EGG McMUFFIN… I’m going to EAT YOU!

1 Dec

20131117-121150.jpgSo… most of my mornings start with ‘morning, what would you like for breakfast… lunch… dinner’.  My whole day revolves around my meal times and I love to plan my meals – not only does this help me save a little money but it prepares me for my day ahead.

My normal weekend breakfasts generally HAVE to include an egg somewhere.  I love eggs… mainly scrambled, with lurpack butter on top of  an English Muffin – and for those that know me well they will know that this is my standard Saturday/Sunday morning treat.

When asking this question a couple of weeks ago the response was a SAUSAGE & EGG McMUFFIN.  To be honest I was a little horrified this a) meant I would have to get up, get dressed, get in the car and head to a fast food restaurant, b) eat breakfast from a fast food restaurant and c) i’ve never had a sausage and egg mcmuffin and I wasn’t sure it was really what I desired for my breakfast treat.

This is where ‘comprimise’ is required and after a little discussion and working out what was in the cupboard (or what extra was required from the local store), it was agreed that it would be MUCH tastier to try and make our own, and so we embarked on creating our very own, up market, homemade, delicious SAUSAGE & EGG McMUFFINS.  They were unbeilveably tasty, the best breakfast I have had in a very long time. WOW.  So… here is how to make them yourself.

PREPARATION TIME: 15 minutes

COOKING TIME: 15 minutes

MAKES: 4 McMuffins

INGREDIENTS for the sausage burgers…

  • 8 linconshire sausages
  • Plain flour

INGREDIENTS for the potato rosti’s….

  • 1 large potato
  • 1 egg
  • 2 heaped tablespoons of plain flour
  • salt
  • black pepper

INGREDIENTS for the poached eggs…

  • 1 pan full of boiled water
  • 2 tablespoons of vinegar
  • 4 eggs

INGREDIENTS for the muffins..

  • 4 English Muffins
  • Lurpack Butter
  • 4 slices of burger cheese

HOW TO MAKE THE AMAZING McMUFFINS

The first thing that you need to do is to make the potato rosti’s as these take the longest to cook.  I was told that a Sausage & Egg McMuffin should always be purchased with a hashbrown, but we didn’t have any hashbrowns and I really wanted to make everything, so I decided on potato rosti’s.  They did not disappoint.

Peel the potato and discard of the skins.  The grate all the potato on the largest grater, place all of this in bowl and then you need to squeeze out the liquid before you can start adding all your other ingredients.  So take a handful of the grated potato and over another bowl squeeze this together quite hard using your hands, lots of liquid will come out of the potato.  When you cannot get anymore liquid out place this to one side and continue until you have done this to all of the potato and then throw away the liquid.  If there is too much liquid in the potato then they will just be a soggy mash potato, not a rosti!

20131117-113514.jpg

Stage 1 – grate all the potato, without the skins.

20131117-113528.jpg

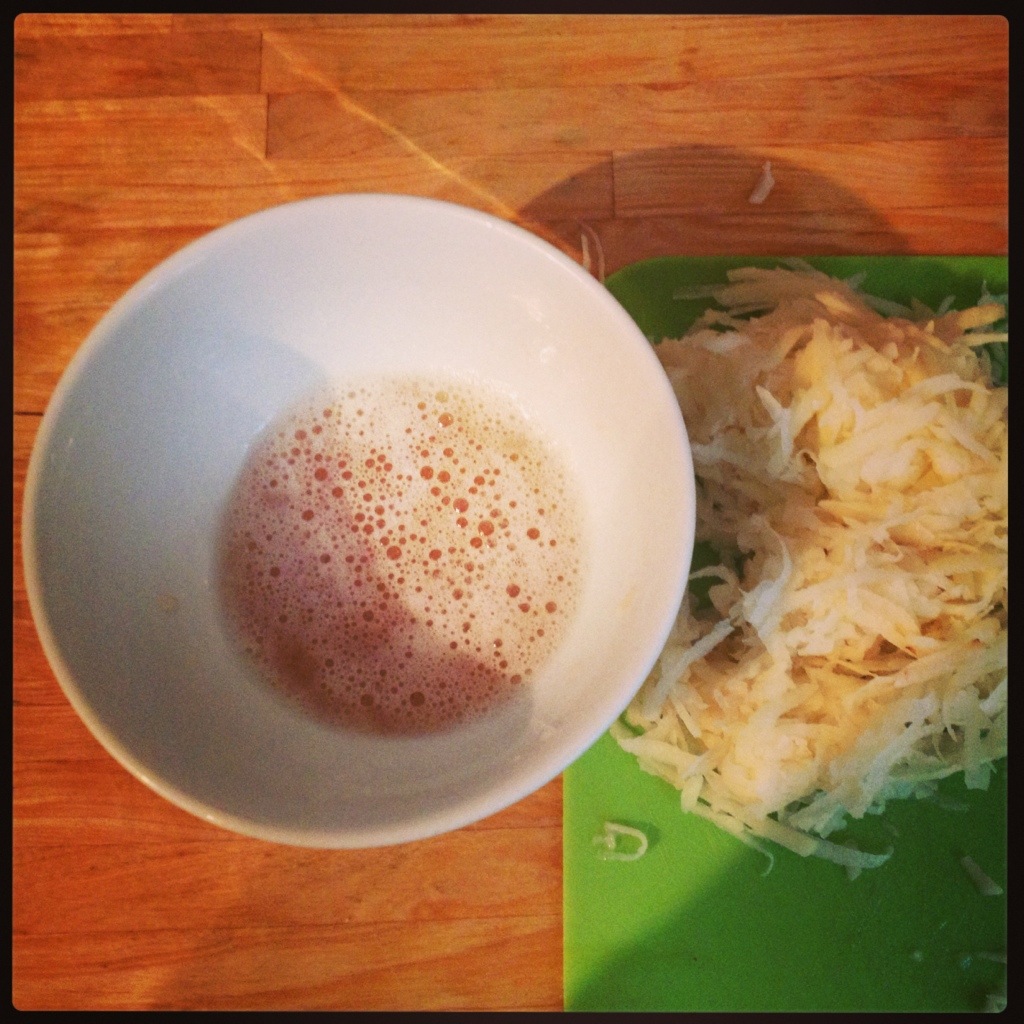
Stage 2 – squeeze out all of the liquid from the grated potato and then throw this away.

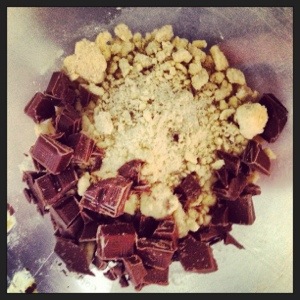
Now you can add the egg, the flour, salt and pepper to the potato and mix all of this together…

20131117-120757.jpg

Stage 3 – add the flour, egg, salt and pepper and then mix well until all combined.

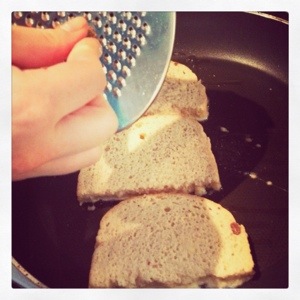
Place a frying pan on a low heat and add a little olive oil to the pan.  Heat until smoking slightly.  Now it is time to get MESSY!  So, using your hands take a handful of the rosti mixture and roll into a bowl.  Place into the frying pan and then repeat until you have 4 rosti’s in the pan.  Using a spatula flatten the rosti’s so you have 4 rounds that will fit into your mcmuffins.  They should look a little like this…

20131117-120817.jpg

Stage 4 – The rosti’s rounds cooking, flatten them gently using a spatula.

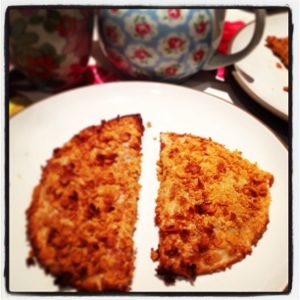
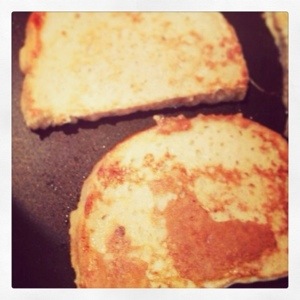
The rosti’s will need to be turned over every minute or so that they don’t burn.  Once they are golden brown, they can be transferred to an oven tray and place on 200 degrees, for about 15 minutes, so that the potato cooks through.  When they are cooked they should look a little like this…

20131117-121110.jpg

FINALLY – the rosti’s are cooked and ready to be placed in the mcmuffin tower.

Now we need to make the sausage burgers.  This is really easy to do.  Take the linconshire sausages, taken them out of their skins and then roll together 2 of the sausages (without skins) into a pattie shape.  Use flour on your hands and on the sausage meat to stop them sticking to you and making a big mess!  We didn’t do this at first and could NOT get the sausage meet off our hands.  Again, heat a little oil in a frying pan and add the sausage burgers to the pan and cook until golden…

20131117-120906.jpg

Sausages, flour for your hands and scisors to remove the sausage skins.

20131117-121003.jpg

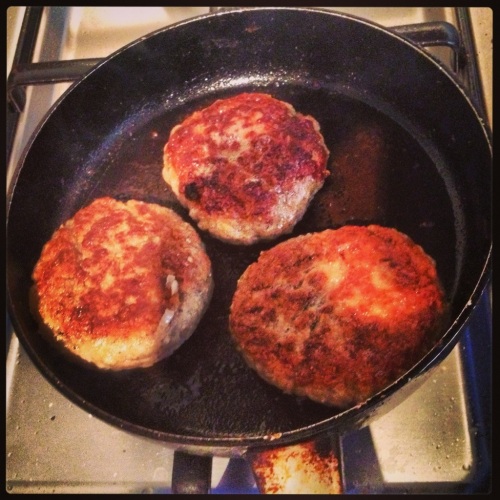
Keep turning every few minutes until the burgers are golden brown.

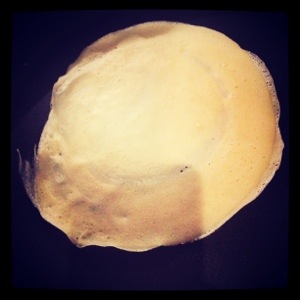
There are now only a few things left to do, one of the most important though is to poach the eggs.  So take a large pan, add boiled water and then keep on a low heat.  To this add 2 tablespoons of vinegar and then leave to boil/bubble – but only a little.  Break an egg into a cup and then holding this in one hand, create a ‘vortex’ in the water with a spoon and into the middle of this gently place the egg.  The cup will allow you to get the egg close to the water and drop it in all at once without it going in in little bits!  The swirling water will bring all the egg together and create the perfect poached egg.

20131117-121020.jpg

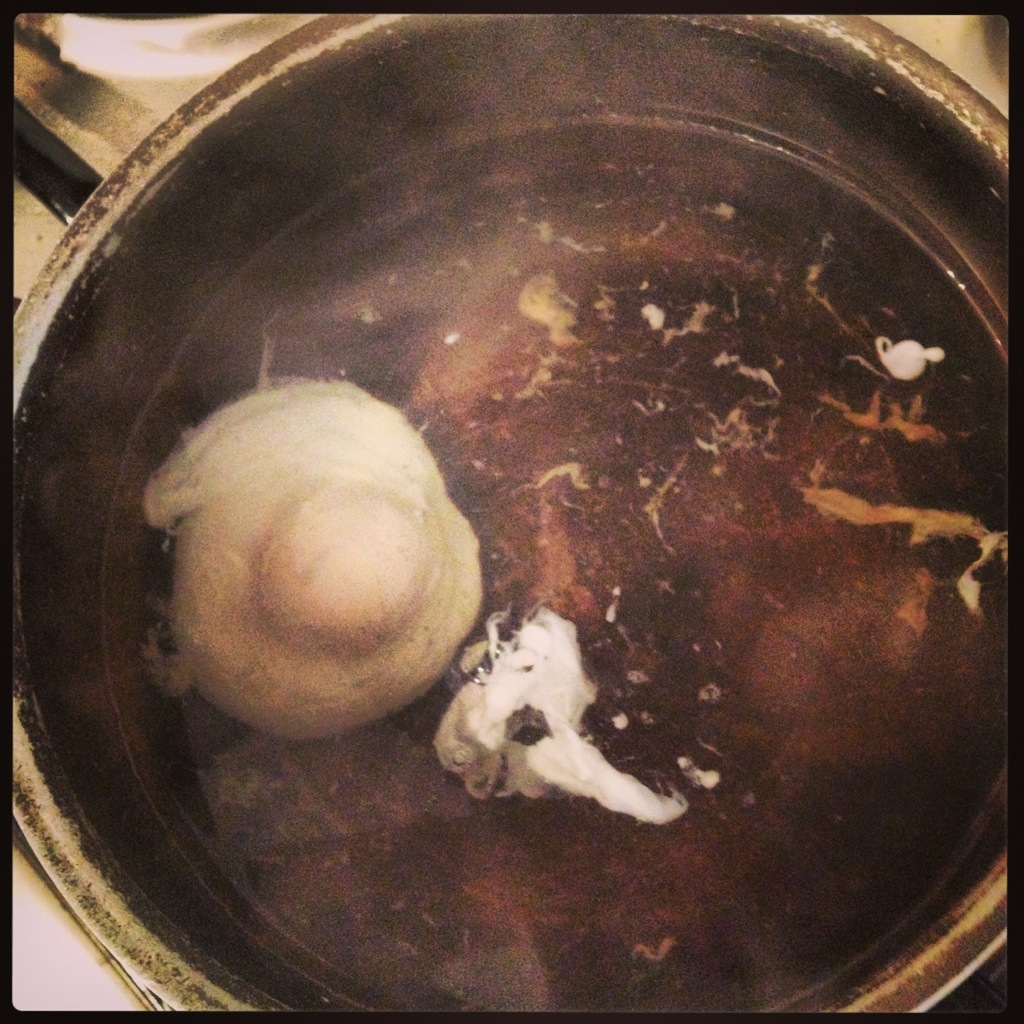
My perfect poached egg…

Take this out of the water using a slotted spoon and then place to one side – on a plate and then cook the other poached egg.  A few minutes before serving place all the eggs in the water to heat through.

Last, but certainly not least, you need to prepare the muffins, so take slice them in half, toast them lightly, spead a layer of Lurpack butter onto them and then place the cheese on, so that this melts…

20131117-120933.jpg

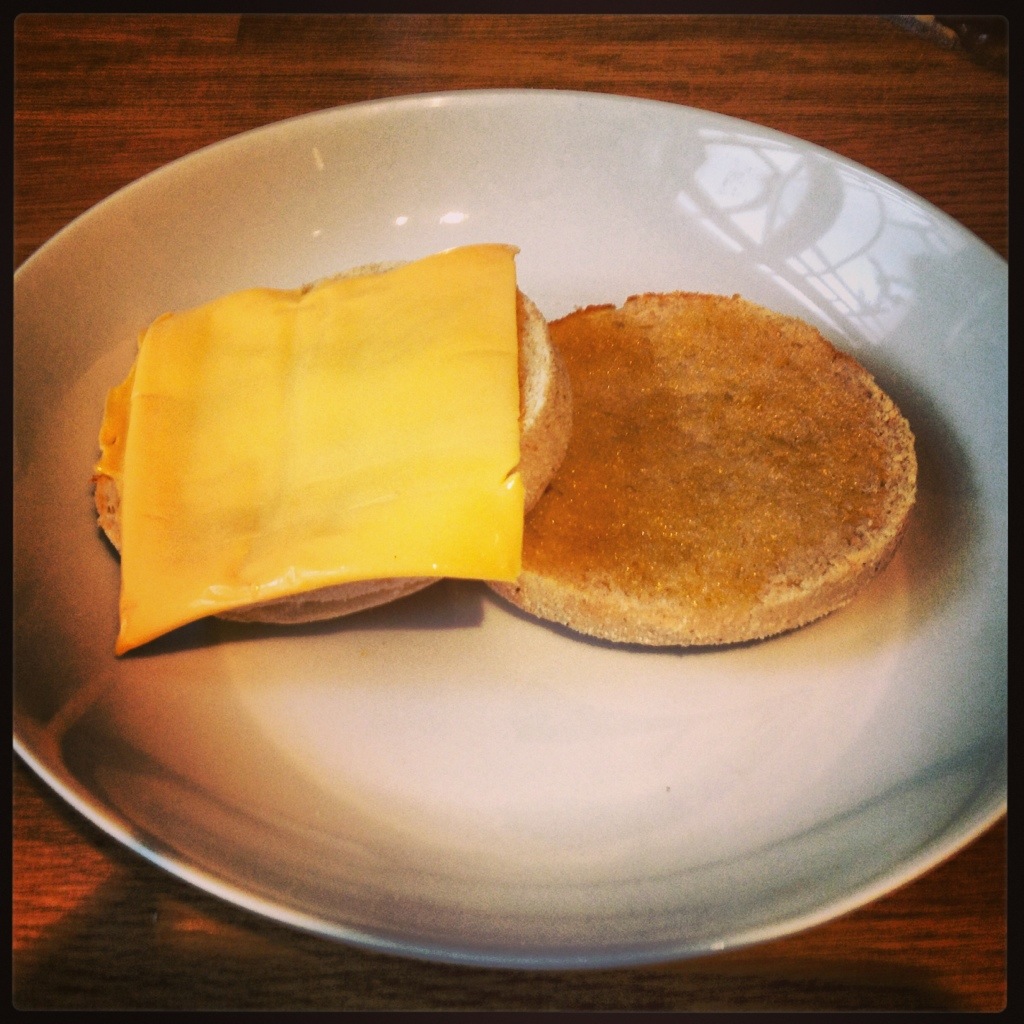
Toasted muffins with butter and cheese on… yum!

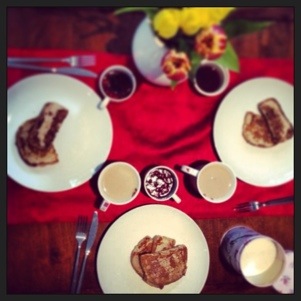
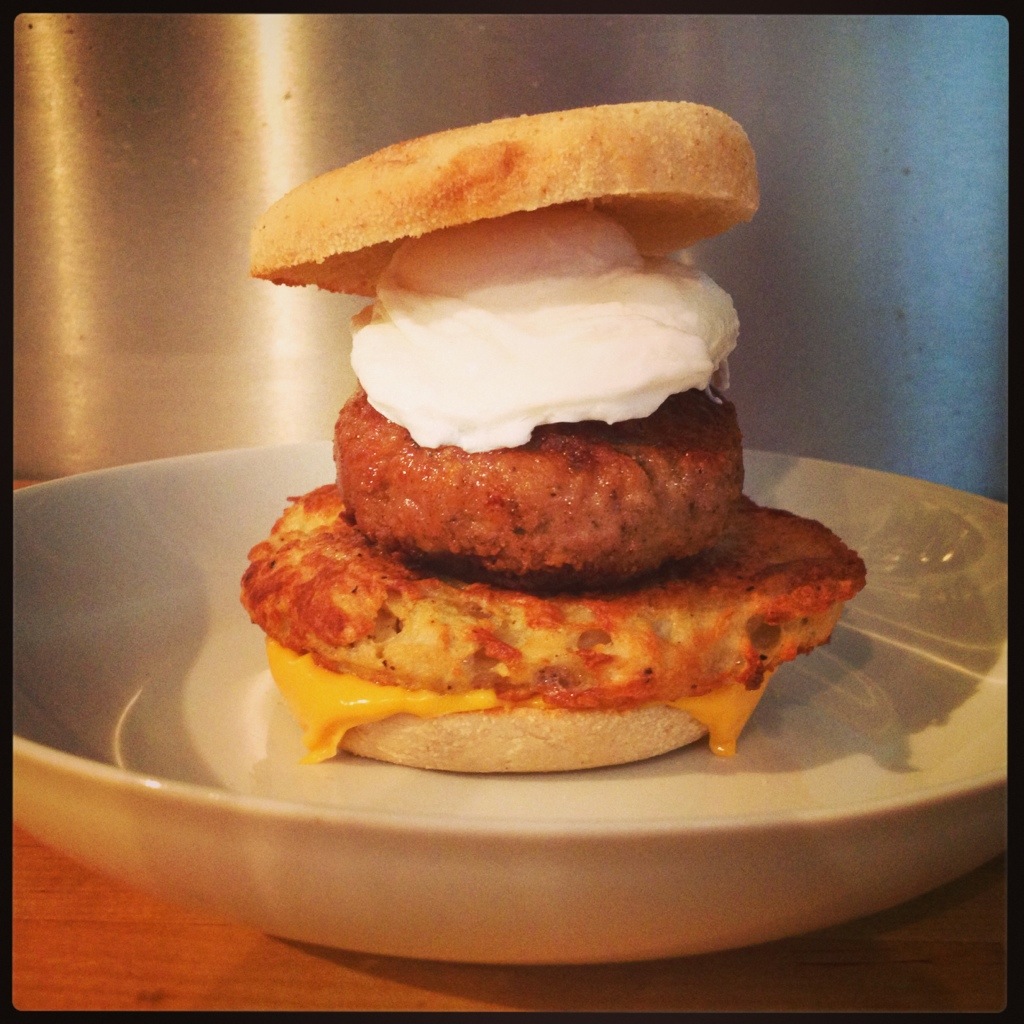
Now you can build your SAUSAGE & EGG McMUFFIN and then it is time to eat!  Here we go… rosti on top of the cheese, followed by the burger, followed by the poached egg and then top with the muffin lid!  NOW IT IS TIME TO EAT the McMuffin.. ENJOY!!  (I tell you it is well worth the preparation time and the cooking time and it is a total treat!)

20131117-121150.jpg

20131117-121210.jpg

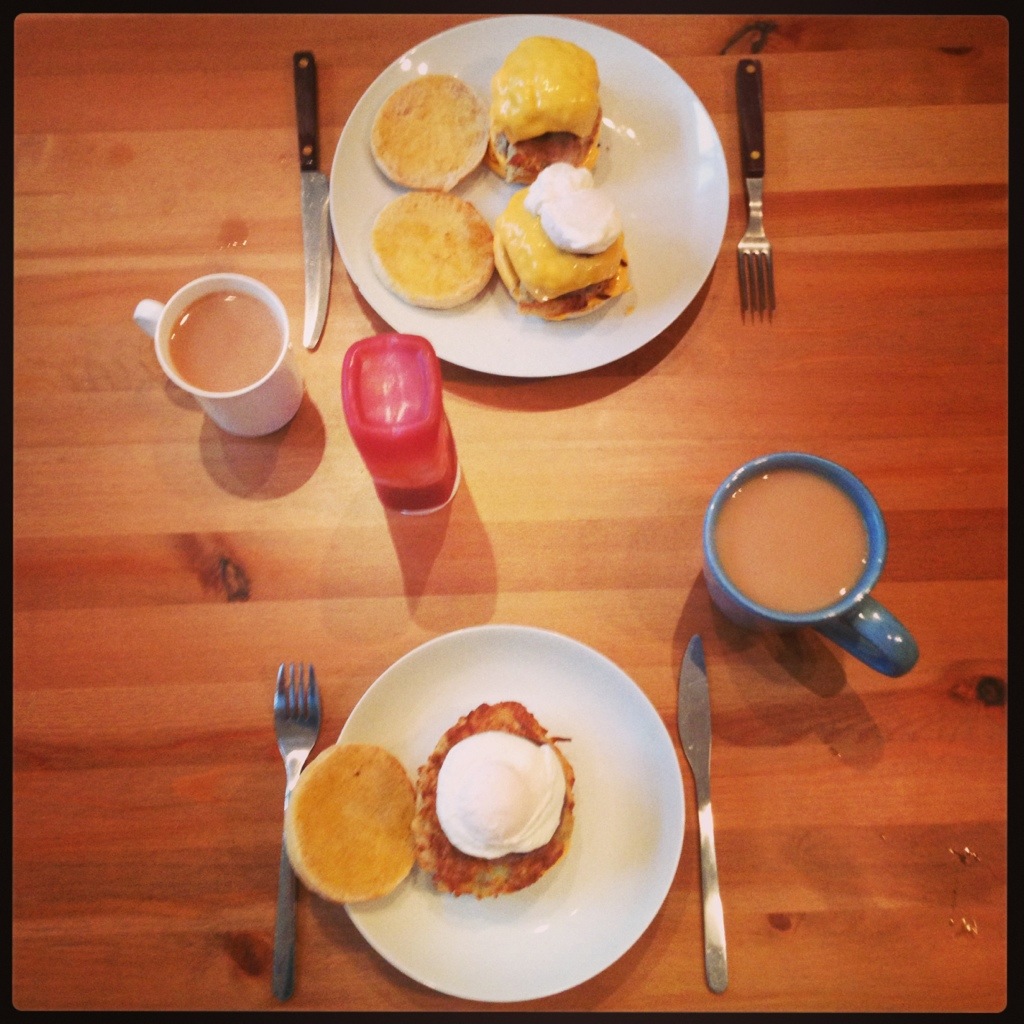
BREAKFAST is served!!

20131117-121225.jpg

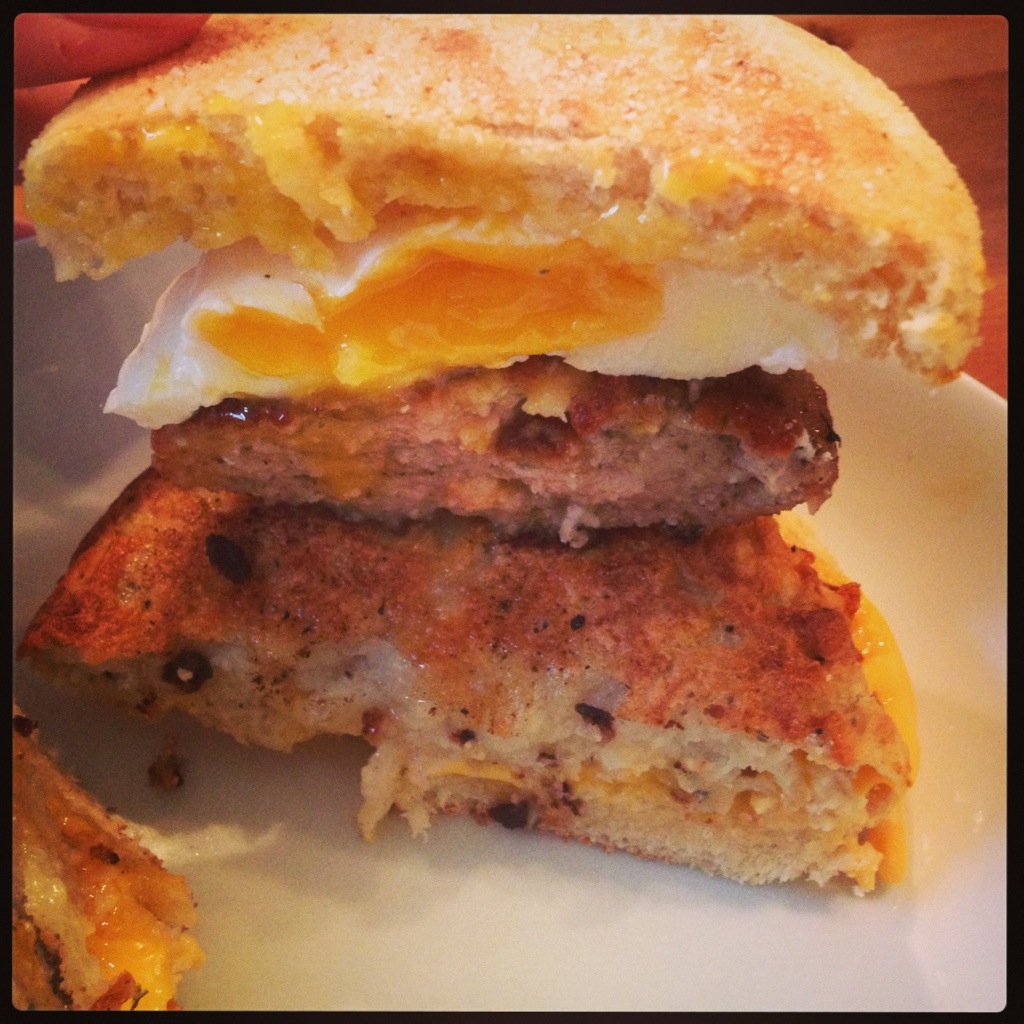
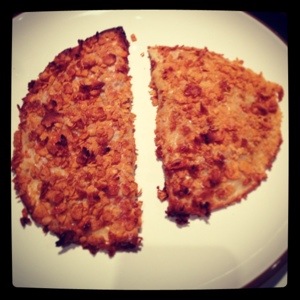
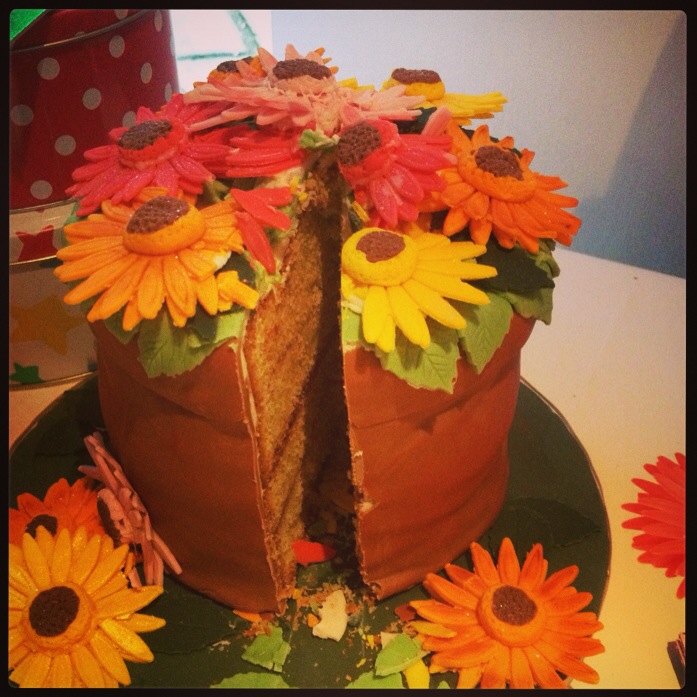
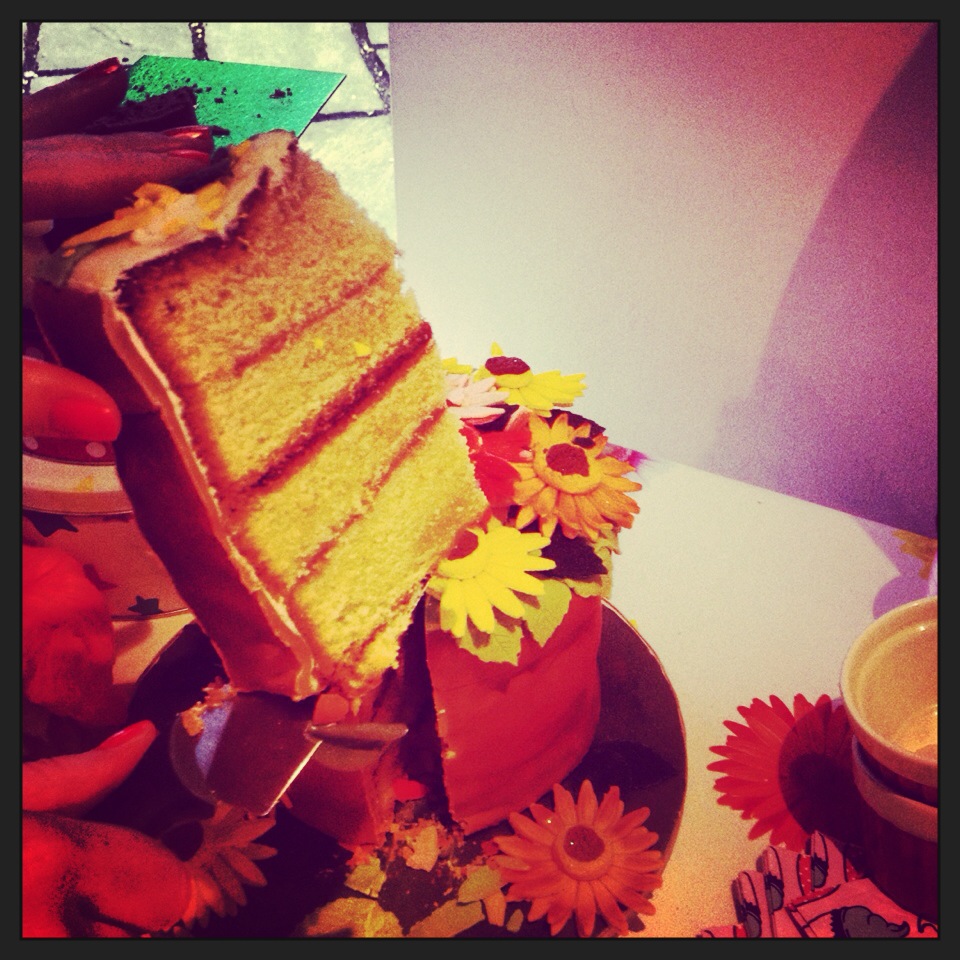
How amazing does this look when it is sliced through!? WOW!

20131117-121250.jpg

ALL GONE!


Oh BOY, oh boy… Rustling up a little *Carbonara*

17 Nov

20130628-072722.jpgOver the last few months I have seriously neglected my love of blogging and cooking yummy foods – not because I have fallen out of love with either of these things, but because my life has well *changed* a little.

Things were not really working out for me in my previous job, so I went for a complete career change and am now a very happy bunny.  My new job has taken over my life, (but only for the good) and now that my training period is complete I am ready to start getting back to writing my blog and cooking up some yummy foods again!

As well as changing my career I also have to admit that a BOY has entered my life and I have been teaching him how to cook some simple dishes, make meals that he/we can have for lunch during the week and just spending quality time with him.  SO APOLOGIES for neglecting you gemsfoodgems.

My work hours have changed significantly and returning home from work at 7:30pm in the evenings doesn’t leave much time to cook a healthy, delicious but most importantly QUICK meal.  Therefore my repertoire has changed considerably and I have been making more ‘simple’ dishes (it has also given me change to teach the boy a few things).  So here is one of my favourite, quick and easy recipes (and also one of the first meals I made for him).

PREPARATION TIME: 5 minutes

COOKING TIME: 15 minutes

MAKES: 4 portions of carbonara

INGREDIENTS:

  • 300g brown pasta (I always choose penne, but for a traditional carbonara use spaghetti)
  • 4 -6 rashers of bacon (smoked or unsmoked)
  • 1 large egg
  • 50ml semi-skimmed milk
  • 125g Philadelphia cheese (or any cream cheese)
  • 150ml single cream
  • Black pepper
  • Parmesan to serve
  • 1 garlic bread – optional

HOW TO MAKE THE CARBONARA…

First boil the kettle, get a large pan at the ready and place the brown pasta into the pan.  Once the kettle has boiled pour the water over (so all the pasta is fully covered) and then bring to the boil.  Leave on a rolling boil for 12 – 15 minutes, until the pasta is al dente (i.e. cooked but not too soft – it should have a little bit of bite!).

Whilst the pasta cooks chop the bacon into small cubes.  I use 4 – 6 rashers of bacon as it is quite salty and too much salt is good for no one!  If I buy thick cut bacon then I will use just 4 rashers, if I buy standard bacon I will use 6 as you want to be able to taste the bacon, but too much isn’t good.  You could use the bacon bits if you wish (this will save even more time), but I don’t like doing this as the bacon bits are generally VERY fatty.  I cut all the fat off my bacon and use just the meat – for health reasons, but also because I HATE chewy non-edible bits of food.  YUCK.

Place a large frying pan on the heat, once warm/hot add the bacon to the pan and allow to cook until golden/brown in places.  Turn off the heat and leave to cool a little.  Whilst this cools in a jug add the single cream, milk and the large egg; then whisk for a couple of minutes.  Now add the cream cheese to the warm pan, with the cooked bacon bits and stir.  This will ‘melt’ the cream cheese and it will become a little more sauce like – as oppose to a solid lump.

The pasta should now be cooked, so drain the pasta (so there is NO water left) and then pour into the frying pan with the bacon and cream cheese.  To this add the mix of cream, milk and egg, season with black pepper (to your taste) and then begin to gently stir.  You do NOT need to add any heat to the pan at this stage, as the pan should be hot enough and the cooked pasta should also have just enough heat to start making the sauce thicken.  If at this stage this does not occur, add a little heat to the pan (a very low heat) and keep stirring/mixing the pasta and sauce until the sauce thickens.  The egg will allows this thickening process to occur, so if you do not stir/mix well enough you WILL end up with scrambled egg bits through your sauce – which is not good!

It should look like this…

20130628-072833.jpg

My penne carbonara nicely thickening in the pan…

Once your pasta carbonara has got to this stage, is heated through and smelling great you are ready to serve!  So, its time to get the plates ready and if you have cooked a garlic bread (it will need to go in the oven when the pasta starts cooking) then it is time to serve – along with some grated parmesan on the top.  The new boy and I LOVE this little dish and we even get a portion each for work the next day… a little bit of heaven ENJOY!

20130628-072813.jpg

YORKSHIRE PUDDINGS… a Sunday Roast is not a Sunday Roast without them. Aunt Bessie eat your heart out!

14 Jul

20130628-073606.jpgAs per the title of this post, a Sunday Roast is not a Sunday Roast without YORKSHIRE PUDDINGS… and many of them.  Don’t get me wrong, I do love going out for a Sunday Lunch, however I only ever get ONE Yorkshire Pudding and I find that very very upsetting.

When I was a little girl Yorkshire Puddings were the thing we always argued every Sunday… and that was not just me and my little sister.  That was my Mum and Dad too!  My mum would make a ‘batch’ of yorkshire puddings.  Sometimes this would be 12 and as we got older it would be 16.  Then when Mark joined our family (my wee sisters other half) we started making 20.  So… ‘3 each’ or ‘4 each’ was the rule shouted as they were brought into the dining room.  During the meal we would ask each other ‘how many have you had?’ and we would systematically go around the table.  Sometimes LIES were told.  This would cause chaos… especially if you had simply and innocently forgotten how many you had (cough cough).

So… we grew up with Mum making Yorkshire Puddings every Sunday and therefore my sister and I are adept at making Yorkshire’s.  I therefore find it very ODD that people are shocked and amazed when I whip up a batch and don’t rely on Aunt Bessie’s fake, thin and skimpy puddings.  OH NO.  If I did that Mum would disown me, and rightly so.

In fact neither my sister nor I use a recipe, so this is going to be quite hard for me to write!  But here we go…

PREPARATION TIME: 10 minutes

COOKING TIME: 15 minutes

MAKES: 12 Yorkshire Puddings

INGREDIENTS:

  • 4 heaped tablespoons of plain flour
  • A pinch of salt
  • 1 egg
  • Milk (enough to make a smooth batter)
  • Vegetable oil / lard /butter

HOW TO MAKE THE PUDDINGS…

First things first and possibly the MOST important stage.  Get out the Yorkshire Pudding tin… which is the one that is smaller than a muffin tin and is used to bake buns not cupcakes.  (I hope this makes sense!)  To each well in the Yorkshire Pudding tin add 1/2 a teaspoon of oil/butter/lard.  I prefer to use vegetable oil as I don’t think it adds a taste to the puddings.  Now place this in a hot oven – so heat the oven to 200 degrees (gas mark 5) and then place in the tray with the oil.  You want to leave this to ensure that the oil is very hot, which should take about 10 minutes.  Whilst this heats up, lets make the batter…

In a medium sized bowl (or if you are like me I find it easier to use a measuring jug, as it will allow me to pour the mixture out neatly) place the 4 heaped tablespoons of plain flour in and add to that the pinch of salt (but only a pinch).

Mix together the salt and flour and then make a well in the centre – a hole!  (I say this to the children I work with and they look at me like I am crazy!!)  It simply means make a space in the centre.  Into here add the egg (obviously crack it open!) and then add a good glug of milk.  If you want some help here, about 6 tablespoons of milk – but it doesn’t matter if its slightly more or less at this stage.

Now, using a fork start whisking the egg and milk (only) in the centre.  Keep going and you will notice that gradually the flour starts to stick and come into the mix, keep going and going until a lot of the flour has come into the milk/egg now you should be starting to get a think paste… don’t let it get too thick as so far you will have avoided lumps.

Add a dash of milk and continue to mix.  Add another dash of milk and repeat.  You can now bring in the rest of the flour by mixing around the sides of the bowl and add another dash of milk.

The batter for Yorkshire Puddings and pancakes is the same, the only difference is the thickness.  For pancakes you want a very thin consistency, for puddings you want a thick batter.  So in between the consistency of houmous and pancake batter.  (Hummm this is hard to explain).  So keep adding milk until you get the batter to this consistency and whisk well to ensure there are no lumps.

Now your oil should be hot, so take the tin out of the oven (using a glove) and begin pouring in the batter.  You want to fill each well up until it is approx. two thirds full – this will allow room for rising.  You also need to act very quickly as you need the oil to be hot as the batter hits it.  So, fill each well and then get them puddings straight into the oven.

Leave for 15 minutes and DO NOT OPEN THE OVEN.  If you do they could drop and then you won’t get the impressive rise.  After 15 minutes open the oven and have a peak.  If they are golden they are ready.  I like mine a little doughy/heavy so I take them out after 15 minutes.  If you like them lighter in weight and darker in colour then leave them for another 5 minutes.

Add them to your roast dinner after declaring ‘2 each’ or ‘3 each’ and enjoy!  Any leftover batter (if you are cooking for one or two) could be used as pancakes… you just need to add more milk.  ENJOY and please… don’t fight.

20130628-073635.jpg

My finished YORKSHIRE PUDDINGS… GOBBLE GOBBLE!

Live Below the Line: Tasty vegetable & BARLEY (but a little bit ugly) SOUP, ready for winter…July

28 Jun

20130628-070300.jpgSoup… a way to save money, loose a little weight and boost my vegetable intake.  So, why not!  I love soup, I really really do.  I hate soup when my tuppawear opens and it leaks all over my bag, but this is a very rare occurance and it is the ONLY time I dislike soup.  I cannot think of any reason why people should not make it and eat it in summer… it lasts in the fridge, the taste increases (for the better) overtime and I just love it… as I am sure you will to.

I think soup is a traditionally quite a nothern staple.  I know as a little girl we were served a smooth vegetable soup as soon as my mum thought one of us had even a slight cold (evidenced by a little cough or a sneeze that she noticed and prayed upon).  Rather than it being a torturous occasion to have this soup, we would relish it and if we were really good mum would either make some homemade bread to go with it, some baked chicken wings or (my personal favourite) a little cheese on toast.  I have  (over the years of living away from home) tended to experiment with soups and now, as an adult, see them as a great way to boost my vitamins, minerals and even my fibre intake – with added pearl barley.  I am also more than happy to order them for dinner in a restaurant, as they are generally inexpensive, heart warming and really really filling.

I love pearl barley, nearly as much as I love soup.  It really bulks out a dish, but it is a wholegain and is great for your digestive system, as it is high in fibre and wholegrain goodness (extra B vitamins and some essential fatty acids).  It is also very cheap and if fills me up, so there is not much more that I could want from a food product!  If you haven’t cooked with it before, there really is no need to worry.  It is extremly simple to use, you just need to ensure you cook it until it is soft (like rice!).

I have decided to make this recipe a part of my ‘Live Below the Line’ series, as it really is THAT cheap to make.  You don’t even have to add the chicken (maybe just add some more veg if you don’t) but if you don’t have a lot of money and want something wholesome, healthy and low in calories, high in nutrients then you really don’t have to look any further… here we go!

PREPARATION TIME: 10 minutes

COOKING TIME:  45 minutes

MAKES: 4 portions

COST: 42p per portion (without the chicken it would be cheaper at 20p per portion)

INGREDIENTS:

  • 2 chicken thighs or 3 drumsticks (£3.00 for 6 thighs, so £1 for 2 – you could use a wing or drumstick, I prefer to buy de-boned thighs just to save me some time but using the drumsticks would cost about 88p)
  • 1 chicken stock cube (10p)
  • 2 carrots (12p)
  • 1 potato, or 5 new potatoes with the skin on (28p – see if you can buy them singulary or if there are any offers on large bags or reductions)
  • 1 large onion (if you buy a large bag of about 16 onions for £1 then use 2 of these as they are a little smaller – this will set you back about 12p)
  • 1 cup of pearl barley (59p for a 500g bag of this and you will need about 150g of dried pearl barley, so this will cost 17p)
  • Water (to cover, about a litre)
  • Black Pepper (to taste – a store cupboard ingredient)

HOW TO MAKE THE CHICKEN & BARLEY SOUP…

The first thing to do is to finely dice your carrots and your onions and pop them in a large pan.  To this add a dash of olive oil and cook for 5 minutes until they are just start to soften.

Whilst the carrots and onions cook, soak the pearl barley in a bowl with boiling water and place to one side (for about 20 minutes).

Add the chicken, and the stock cube to the pan and then cover with water.  If you are using a medium sized pan, fill the pan until the water level comes to about 2cm below the top (it should be about a litre, but you may need more – it depends if you want a thick chunky soup or a slightly more watery, soup).  Place a lid on and bring to the boil.  Once boiling reduce the heat and simmer for 30 minutes.  At this point the chicken should be cooked, so remove from the pan and place on a chopping board.  You need to cool the chicken down, so that you can shred it.  If you do this whilst it is still hot you will have very sore hands!

The pearl barley should now have softened a little, so pour into a sieve and then rinse until the water runs clear.  This will mean you have removed some of the starch, which is fine.  Add this to the soup and again return the soup to the boil.  Dice the potatoes (with the skins on for extra fibre) and then add to the pan.  You need to cook this until the pearl barley is soft… it’s a little like cooking rice.  If you don’t cook it through it has a hard centre which tastes bitty and unpleasant.  It will take about 20 to 30 minutes for the pearl barley to soften, so once boiling, reduce to a simmer and continue to cook.

Once the chicken is cooled, remove the skin and discard, then shred using a fork (or your fingers… after all they were they best tools we were born with) and then add this back into the soup.  Discard the bones and continue to cook the soup until all the vegetables etc. are soft.  I would add my pepper with about 5 – 10 minutes of the cooking time left and then taste to ensure I have added enough.

This soup should not be blended to a smooth consistency – which is why it is important to dice the vegetables nice and small.  Then serve… use a nice bowl to make it look a little prettier and if you wish serve with some nice chunky brown bread.  YUM!

20130628-070337.jpg

The finished soup! I know it does not look that appetising, but that is because everything (the pearl barley) has sunk to the bottom and is all I could photograph was the watery soup… believe me it TASTES AMAZING!

Shortbread SISTA’s… with some sisterly LOVE x

23 Jun

20130623-105240.jpgLast month I popped home… to the North, for a long weekend and we decided to have a family baking day.  My little sister was DYING to show me her shortbread recipe and as I had just purchased some cheeky little LOVE heart cutters, it seemed completely apt to get them out and make some sisterly shortbreads.

So, I do hope you enjoy the recipe, my little hand model and the abuse I got during this baking session… but we love each other really and its all part of the fun of baking!

We decided to play around with the shortbread recipe, so we made some plain shortbreads with cinnamon sugar on the top and then we made some chocolate shortbreads, which were wonderful and last but not least some almond and cinnamon shortbreads.  All of them were absolutely delicious and very quick / easy to prepare

PREPARATION TIME: 8 minutes (per batch)

COOKING TIME: 20 minutes (per batch)

MAKES: 8 shortbreads (per batch, we made 3 batches as per the below!)

INGREDIENTS:

Gemma’s basic shortbreads, which follow the 3 to 2 to 1 recipe…

  • 150g plain flour
  • 100g butter
  • 50g sugar

…We added cinnamon sugar to the top of these, so mix 50g brown sugar with 2 tsp cinnamon and then sprinkle over the top before baking.

Rebecca’s chocolate  shortbreads…

  • 150g plain flour
  • 100g butter
  • 50g sugar
  • 80g dark chocolate / milk chocolate /white chocolate (broken up into bits)

SallyAnn’s almond and cinnamon shortbreads…

  • 100g plain flour
  • 50g ground almonds
  • 100g butter
  • 50g brown sugar
  • 50g flaked almonds
  • 2 tsp cinnamon

… you could add the cinnamon sugar to the top of these too, just for some extra tastiness.

HOW TO MAKE THE LOVELY SHORTBREADS…

You definitely don’t have to make all three batches of these shortbreads, you could just choose one and have a go.  They really are one of the most simple recipes I have ever made.  At first, when my sister suggested it I was concerned that they would take a long time to prepare as my perception was that shortbreads are quite a tricky, fiddly thing to make, but they really really are not and as we demonstrated you can play around with the ingredients and add whatever you like.  We did not follow a recipe for the chocolate / almond shortbreads, we just got a few ingredients out of the cupboard and had a go (which I think is the fun of baking).

I would urge anyone who is a keen baker to start experimenting with recipes and flavours, it really adds a new dimension to baking and I think its something that has really changed my baking style over the last year and using a new ingredient is not something that phases me.  When I next make these shortbreads I am going to play around with a home-made apple purée and apricots/almonds or even one batch with dates.

  1. Weigh out the butter and place this in a large bowl.
  2. To this add the sugar.
  3. Cream together the butter and the sugar.
  4. Weigh out the flour and add this to the mixture.
  5. Bring together into a smooth, thick paste.

If at this stage you have made a double/triple batch of this mixture then separate out and add whatever fillings you like either chocolate or almonds or apricots.  I am going to show you (with the help of my hand model) how to make these shortbreads.

20130623-092824.jpg

First, flour your worktop.

20130623-092853.jpg

Take your shortbread dough out of the bowl and then shape gently into a round.

20130623-092909.jpg

Pat down a little.

20130623-092923.jpg

Roll out…. Roll 3 times one way and then turn 90 degrees. Roll again and then rotate again.

20130623-092938.jpg

Roll out until the dough is about 1cm to 1.5cm thick.

20130623-093000.jpg

Now you can cut out your shortbreads into whatever shape you desire. We choose love hearts (to use my new cutters). If you don’t have a cutter, you could use a stencil like the one below…

heartpattern

Use this stencil if you want to make love hearts and don’t have a cutter!

20130623-093040.jpg

Cut out all your shapes and then gently remove from the dough. Bring the dough that is left together, but DO NOT PLAY WITH. Literally bring into a lump/ball and then place to one side.

20130623-093054.jpg

Place gently on your baking tray. Line the baking tray with a non-stick sheet, but if you don’t have one of these use butter to grease the tray.

20130623-093106.jpg

If you want to make chocolate ones, add the chocolate and then bring together into a dough.

20130623-093117.jpg

Roll to 1cm to 1.5cm then cut out…

20130623-093143.jpg

Space evenly on the baking tray and then, if you are sprinkling with sugar, do this at this stage, before you bake the shortbreads. Bake in the oven at 180 degrees / gas mark 4 for 15 to 20 minutes, until golden but not brown. You want them to be doughy/soft inside, not hard and crunchy!

20130623-093134.jpg

Now it is time to tidy up!!

I hope you shortbreads turn out well… I shall leave you with some of the silliness that happened whilst we were baking!  And no… piggybacking was not offered… I was JUMPED on.  When asked if I could have a piggyback I was told ‘Oooo no, really, but your the big sister who is supposed to give the little sister piggybacks.  Little sisters can’t give them to big sisters as they are BIG‘.  Charming.

20130623-093226.jpg20130623-093205.jpg20130623-103626.jpg20130623-104019.jpg

Making a meal of it… PANCAKES GALORE! (…with very childish, but very yummy fillings!)

16 Jun

20130614-162750.jpgSo, the British summertime is officially here… well in terms of the month in the year it is… June. But, as we are all very much aware we are seriously lacking the summer weather to go with it. Some of us will have holidays booked, ready to jet off in search of the summer sun, but some of us will have been looking forward to simply soaking up the sun in our back gardens, which won’t be happening in the near future. Sorry to dash your hopes and dreams those of you who have bought the lotion ready for the weekend…

I am therefore offering you this recipe as a solution to that ‘rainy day’ with the family. It is actually something I made on pancake day this year for my friends (I am a little bit of a child at heart), so I thought it would be fun to make something inspired by my childhood.

Do you remember ‘Findus Crispy Pancakes’? I do, and a few years ago Hugh Fearnley-Whittingstall made these little gems on ‘River Cottage’ which made me think… I can do that too! Hugh made his with quite adult, modern day fillings, but I regressed straight back to my 8 year old self and made baked beans and sausage pancakes; and bacon in a cheesy sauce. The fillings though can be completely up to you… you can put in whatever YOU like. I shall offer up some suggestions at the end.

My versions of this recipe are not healthy, I warn you. They are about having fun with food and enjoying food. If you want to make a healthy filling i.e. sweet potato mash, white sauce and bacon with broccoli – there is no reason why you could not do this. You could make bolognaise and pop that in, or chilli (see my chilli recipe) or even meatballs (see my meatball recipe). The world is your oyster when it comes to this. The only fillings you cannot use – or I would advise you not to use are soups or salads. The first will not hold well as a filling and life could get VERY messy. The latter would be disgusting/wilted once baked, so do tread with a little caution!

PREPARATION TIME: 1 hour

COOKING TIME: 20 minutes

MAKES: 12 – 16 pancakes (depending on how large/small, thick/thin you make them)

INGREDIENTS

For the pancakes…

  • 200g plain flour
  • pinch salt
  • 2 large eggs
  • 200ml semi-skimmed milk
  • 75ml water
  • Butter (for the pan)

For my favourite fillings and the crunchy coating…

  • 1 box of cheap cornflakes
  • 4 eggs
  • 1 tin of your favourite baked beans
  • 1tbsp tomato puree
  • black pepper (to taste)
  • 4 sausages
  • 1tbsp butter
  • 3 tbsp plain white flour
  • 200ml semi-skimmed milk
  • 80g mature cheddar cheese
  • 6 rashers of bacon (any bacon will do – streaky, plain, smoked)

HOW TO MAKE THESE DELICIOUS, SLIGHTY NAUGHTY PANCAKES…

First of all you need to make the batter for the pancakes and then cook each pancake in a frying pan as per my pancake recipe in ‘how did you have yours!?’.

Once the pancakes are cooked and they are cooling (it is best to use them when they are cool as they will be easier/safer for you to handle), you can start to prepare the filling.

20130214-055049.jpg

My lovely, pancake just golden and very nearly perfectly round! Pile yours up on a plate as you make them and pop to one side to cool…

The first one ‘beans and sausages’ is a slightly more adult version of the traditional beans and sausages, as it uses proper sausages not those weird tinned processed ones! So, take the skins of your sausages and then cut them into small pieces. Coat each piece of sausage with a little flour. Heat the frying pan so it’s warm and then drop the sausage pieces into the pan. You do not need to add oil. Once the sausage starts to cook it will release its own oil. Once the little bits of sausage have turned golden add the baked beans, the tomato puree and black pepper to taste. Mix well and cook until approx. half the liquid in the baked beans has evaporated out of the beans (my younger sister refers to this as ‘bean juice’). You want them to be a little drier so the filling doesn’t just run out.

Place this filling to one side and prepare filling number two…

In a pan melt the butter and to this add the plain flour. Mix these together, you should get a paste. To this add a dash of milk and mix until smooth, repeat until the butter/flour mix is more like the consistency of a thick sauce, with no lumps and then add the remainder of the milk and stir. Add the grated cheese and stir. Place this over a low heat and stir continually. After about 10 minutes the cheese will have melted and the sauce should have thickened considerably. If you don’t stir constantly you could get lumps in the sauce, which you don’t want, so use a figure of 8 motion to stir ensuring you get all the sides of the pan. Once thickened, urn off the heat and cover with a damp towel, so it does not get a skin. You could also use clingfilm, but be careful as the pan will be very hot.

Cook the bacon as you like it – in a frying pan (don’t add oil) or under the grill. Allow to cool and then cut into chunks. It is easiest to do this using a pair of scissors as once the bacon is cooked it is harder to chop. Place the bacon bits into the slightly cooled white sauce, add some black pepper to taste and then stir. The sauce should have thickened even more now it has cooled a little.

Now your fillings are ready, you can start to assemble the pancakes!

HOW TO FILL THE PANCAKES…

Take one pancake and one of your fillings. Place the pancake on a chopping board or plate and using a spoon, spoon about 2 tablespoons of the filling onto one side (only) of the pancake.

20130214-055101.jpg

I choose to use the baked bean and egg filling here to add to my pancake. As you can see its just in half the pancake, and the shiny bit around half of the edge of the pancake is the egg… ready to glue the over half down!

Whisk 2 eggs in a cup using a fork and then, using a pastry brush, brush some of this egg around where you have place the filling in a half moon shape around the edge of the pancake. You only need to egg ½ the edge of the pancake not the whole thing, as then you can fold the other half over and stick it down – the egg will act as the glue. Repeat this with the pancakes and the fillings until all of your fillings are used up.

20130614-160938.jpg

You will now have lots of pancakes that have a filling in and look like this… They need their coats on. This is the exciting/messy bit which makes them crunchy and yummy!

I only put one filling in my pancakes, but you could go crazy and mix them up – just a note, if you are doing this ensure the fillings go together!

HOW TO COAT THE PANCAKES…

You will probably have some whisked egg left, so add the other 2 eggs to this and whisk. Pour this out onto a large plate.

On another large plate crunch up/crush about 4 handfuls of cornflakes. You want the cornflakes to be crushed a bit, as a cornflake is quite large and will not stick as well as lots of little bits will.

20130214-055135.jpg

The pancakes will now be coated on each side with crunched up cornflakes and they are ready to be baked in the oven…

Now you have 2 plates, one with whisked eggs on and another with cornflakes on. Take one of the filled pancakes and carefully place it in the egg mixture. Turn it over so both sides are coated in egg and then gently lift the pancake out and place it in the crushed cornflakes. Turn it over and once both sides are nicely coated, you can take it out of the cornflakes and place it on a baking tray. Repeat this until all your filled pancakes are coated and then bake in the oven for 15 minutes at 180 degrees/gas mark 4. You want the pancakes and the cornflakes to turn golden and for the filling to be heated through.

Serve your pancakes with a salad, some coleslaw or if you are being naughty just as they are! Enjoy!

20130614-160802.jpg

This is how they should look once they have been baked in the oven… golden and crispy!

OTHER FILLINGS…

My versions of this recipe are not healthy, as you will have very much gathered. They are about having fun with food and enjoying food. If you want to make a healthy filling i.e. sweet potato mash, white sauce and bacon with broccoli – there is no reason why you could not do this. You could make bolognaise and pop that in, or chilli (see my chilli recipe) or even meatballs (see my meatball recipe). If you like fish, you could make the white sauce recipe above that I made and then to this add a selection of fish – white fish would work well, or salmon; or you could go very fancy and use some prawns and make a seafood filled pancake! You could make a curry and rice – or use a leftover curry from the night before!? The world is your oyster when it comes to this.

The only fillings you cannot use – or I would advise you not to use – are soups or salads. The first will not hold well as a filling and life could get VERY messy. The latter would be disgusting/wilted once baked, so do tread with a little caution!

If you want to see how Hugh did it with the River Cottage team, you can have a look here. But I think my version is best… as I would!

IT’S MY BIRTHDAY… and I got given this beautiful, delicious cake… I LOVE JAM SPONGE CAKE.

31 May

Birthday CakeThis was the birthday cake I got given on Friday 10th May, ready for my birthday and party on Saturday 11th May.  I literally could not believe my eyes.  It was completely and utterly wonderful, not only because of the fabulous decoration and the lovely personalisation but the cake itself tasted delicious, moist, spongy and overall stunning.  I was one VERY happy lady, VERY spoilt lady.  My favourite things, flowers (specifically Gerbera’s) and cake.  EPIC.

The cake may have been a ‘simple sponge cake’ but that was a huge understatement.  Everyone thinks they can make a Victoria sponge cake and they can… it’s easy, but getting a ‘simple sponge’ to be indulgent and worthy of a birthday cake isn’t an easy task. It takes a while to perfect the basic recipe and the baking technique, but once you have got it – as Leanne Camilleri certainly has, you will be away.

Have you ever had a birthday cake from the supermarket… has it felt ‘fluffy’ in your mouth?  I have, and it did.  It also left a strange taste in my mouth and did not leave me wanting more.  Basically, the cake is made from non-fresh ingredients, so keep manufacturing costs low and to increase the profit margin.  So your lovely birthday cake will contain a range of dried milk, pasteurised eggs, syrup and raising agents – which does NOT say HAPPY BIRTHDAY TO ME.

Here is an ingredient list of a standard sponge ‘birthday cake’ from one of the leading retailers…

Sugar , Wheat Flour , Pasteurised Egg , Vegetable Oil , Buttercream (9.6%) [Unsalted Butter, Sugar, Glucose Syrup, Flavouring] , Raspberry Jam (8.4%) [Glucose-Fructose Syrup, Raspberries, Water, Gelling Agent (Pectin), Acidity Regulator (Citric Acid), Flavouring] , Glucose Syrup , Dextrose , Water , Emulsifier (Mono and Diglycerides of Fatty Acids) , Wheat Starch , Raising Agents (Diphosphates, Sodium Carbonates) , Maize Starch , Salt , Stabilisers (Xanthan Gum, Tragacanth) , Preservative (Potassium Sorbate) , Humectant (Glycerol) , Acidity Regulator (Citric Acid) , Colours (Anthocyanins, Carotenes, Titanium Dioxide, Lutein) , Vegetable Concentrates (Algae, Safflower, Beetroot) , Dried Egg White.

My lovely cake from Leanne Camilleri did not contain any of these unnecessary dried/pasteurised ingredients, it was very obviously made from fresh ingredients and this was obvious from the very first bite.  So I am going to provide you with a very lovely, very simple sponge cake recipe so that you to can make all your own sponge cakes from now on.  DO NOT BUY FROM THE SUPERMARKET, it’s easier, tastier and cheaper to make it yourself.

MY BIRTHDAY CAKE (a few images for you here!)

cake 7

With candles and complete with all my friends singing away!

IMG_5306

… it’s time to make a wish!

cake 5

Time to cut the cake. Believe me I felt very guilty about this!

cake 4

The first slice is out…

cake 6

… and wow 4 layer! NOW TO EAT.

Leanne Camilleri makes cakes like this as a hobby, so if you would like a cake similar to mine, or maybe something more specific, do let me know and hopefully I can put you in touch with Leanne who can make you one of these wonderful, incredible, tasty, beautiful cakes.  I cannot thank her and my lovely friend for the generous thought enough.  You truly made my birthday.

Nigella for breakfast anyone? Oh sorry… I mean a NIGELLA RECIPE MASH UP – Eggy Cinnamon Bread with Jam

30 May

20130529-071711.jpgTo say May has been a busy month would be a slight understatement! I have had family visiting for birthday adventures as well as friends each and every weekend. Although I would change nothing about the last few weeks, I do (after a while) start to run out of ideas of what to feed people as I start to become bored of the same repertoire – eggs and bacon every morning for breakfast. Now I fully understand that this is a ‘classic ‘ not to be messed with and certainly not a dislike, but there is only so much cholesterol one person should consume in a weekend.

Consequently I did a ‘Gemma’ and started to search around for something new… I knew I wanted to make some eggy bread as I love it, but I wasn’t sure how to vamp it up. Luckily Nigella had the inspiration I required and I started to play around with her recipe to create this little gem…

PREPARATION TIME: 5 minutes

COOKING TIME: 15 minutes

MAKES: 4 portions

INGREDIENTS:

  • 3 eggs
  • 40ml full fat milk
  • 40ml single cream
  • 4 tsp cinnamon
  • 1 nutmeg pod/seed and a grater/zester
  • 3 tsp icing sugar
  • 6 slices of stale bread – white or brown is fine, but obviously brown is best as it is healthier than white
  • 1/2 punnet of raspberries
  • 2 tbsp sugar

HOW TO MAKE THESE LITTLE GEMS…

We start by breaking 3 eggs into a measuring jug. To this add the milk and the cream and whisk well. You may be using your only measuring jug, if so, place this with the eggs in, onto your weighing scales and ‘zero’ them. Now you can pour in 40g or milk and 40g of cream. This is because ml and g are virtually the same – one is a millilitre, a measure of the volume of a liquid and the other is a gram which is a weight. Try measuring 10ml and then weighing this 10ml in grams. I promise you it will be the same….

20130529-073709.jpg

Next add the cinnamon and the icing sugar and whisk again. Now you can pour this mixture onto a plate ready to dip the eggy bread in.

20130529-073849.jpg

Cut the stale bread into half slices and then dip into the eggy mixture, allow to soak on one side for 30 seconds and then turn the bread over and allow to soak for 30 seconds. When the bread is completely eggy and gooey, you can pop it into a warm/hot frying pan do not use any oil (you just don’t need it) and cook for a couple of minutes (until the bread turns golden).

20130529-074302.jpg

Eggy cinnamon bread laid out in the frying pan, cooking on one side…

If you like nutmeg, this would be the time to grate a little nutmeg on the top of the eggy bread… Whilst one side is uncooked. Just use a little nutmeg, as eating nutmeg is toxic and eating a lot of this could be harmful to your health – especially for pregnant women.

20130529-074538.jpg

Grate the nutmeg onto the uncooked/eggy side of the bread before turning over.

Once the bread is cooked, and has turned golden on one side, turn over and repeat on the other side. Your bread should now look like this…

20130529-074441.jpg

… beautiful, golden eggy cinnamon bread!

Depending on how much eggy cinnamon bread you are making, it’s going to be best to do them in batches and keep the cooked batches warm. So place the cooked eggy cinnamon breads on a plate or baking tray and place in the oven on a low heat – approx 50 degrees will be fine.

HOW TO MAKE THE JAM…

In a large pan place the punnet of washed raspberries, to this add 1 tbsp of sugar. Cook this on quite a high heat for about 5 – 10 minutes, or until the sugar dissolves, the raspberries break up and the juice reduces a little bit. Place in a mug/jug/cup and serve on the side of your eggy cinnamon bread. Place the other 1 tbsp of sugar in a cup and allow your breakfast guests to sprinkle over there eggy cinnamon bread! YUM!

20130530-073105.jpg

Serve and ENJOY!

Alternatively you could serve the raspberries cold on the side of the dish and sprinkle over a little sugar. The choice is yours.

Alternatively (take 2) you could use a different fruit such as blueberries, blackberries, strawberries, cranberries or gooseberries!  You could use a selection of these, or just one or you could mix it up and use a different one each time you make this dish… it’s exciting isn’t it!

Most of all, enjoy your breakfast/brunch and ensure you get lots of praise and thanks from your dinner guests.

ABC, 1..2..3… with SIXTEEN SiZzLinG Sausages, sizzling in a pan…

21 May

photo‘Why am I calling this an ABC recipe?’ I hear you ask… well… this recipe was sent to me by Anna Buttery and it’s a Casserole!  But making this recipe is also as simple as ABC, 1… 2… 3.  The ingredient list looks lengthy and potentially quite ambitious, but I assure you it isn’t really.  It is all about having the confidence to ‘have a go’ and even if you don’t do everything to the letter, it doesn’t matter as with something as simple as a casserole you can’t really fail.

Follow these simple steps and make a delicious, hearty dinner that you will be extremely proud to show off to your friends and family.  I made it this weekend after Anna recommended it to me, as my parents were visiting London and I had them and 2 hungry house-mates to feed, so the 5 of us sat down to dinner and really enjoyed this meal.  The herbs, wine and balsamic vinegar gave the casserole a fabulous flavour and I found that the recipe wasn’t too expensive make, so I could happily feed everyone for under £10.

I bought some garlic bread and baking potatoes (which I roasted in the oven at the same time as the casserole) as my carbohydrate and they complimented the dish well.  On finishing the meal I still had 4 sausages left, so I had 2 meals for work too.  Just sublime!

PREPARATION TIME: 20 minutes (including cooking the sausages)

COOKING TIME: 1.5 hours

MAKES: 8 portions (to feed your family, or to freeze)

COST PER PORTION: 91p… this gives everyone 2 sausages, lots of beans and casserole sauce and if you then add a carbohydrate to this you want to add an extra 25p per person for a potato or some garlic bread or maybe even some rice.

INGREDIENTS:

  • 16 Cumberland sausages – I bought 3 packs from Sainsbury’s for £5 and used 2 packs, using these offers is a great way to save money – £3.34
  • 1 tin chopped tomatoes – 69p
  • 1 bag Sainsbury’s cherry tomatoes – £1
  • 200g tomato passata – 24p
  • 3 gloves of chopped/crushed garlic – 4p
  • 4 whole garlic cloves – 5p
  • 2 large onions (red or white)
  • 2 rosemary sprigs – from my garden so free to me!
  • 1tbsp fresh thyme – also from my garden so free to me!
  • 1 can of cannellini beans – 69p
  • 1 can of baked beans – any brand will do, I had a spare tin of Heinz, Branston are cheaper and have more flavour but the Sainsbury’s own are the cheapest, so the choice is yours – 70p
  • 150ml Red wine – only use this if you have a leftover bottle lying around, I did so this went in.  If I hadn’t I would not have opened a bottle for this, as I just cannot afford to.  For this reason, and because we are using up leftovers this is pretty much a freebie!
  • 4 tbsp balsamic vinegar – 30p
  • 1 red chilli with seeds or 3 tsp chilli powder – this is a store cupboard ingredient, or if you have a chilli plant in the garden it’s pretty much free!
  • 1 tsp paprika – this is a store cupboard ingredient, so we don’t need to include this in the costings.
  • 1 Kallo stock cube – beef or pork is fine, use Kallo as they are organic, have less salt and more flavour, cheaper stock cubes mean you are paying for expensive salt! – 12p
  • 2 stalks of celery – 10p
  • 100 ml water – if you do not use the red wine increase this to 200ml

HOW TO MAKE THIS DELICIOUS CASSEROLE…

So, the first thing to do is to cook the sausages! Lets get them going in the frying pan, turning them a quarter turn ever couple of minutes so that they become nice and golden/brown all over.  This should take about 10 minutes.  Once done remove them from the pan and place them on a plate to rest.  Do not throw all the ‘sausage juice’ left in the pan away, as this is where most of our flavour is going to come from.

IMG_5413

…my sixteen sizzling sausages, sizzling in the pan!

Next, peel and chop the onions in to 8ths and separate a little.  Throw these into the pan with all the sausage juice and cook until golden.  To this add the little pieces of celery, the chopped/crushed garlic and then the pressed, whole garlic cloves in their skin. Cook for 3 – 4 minutes and then add the chilli, the chopped up rosemary, the thyme (leaves only, not the twig bits as these will get stuck in your teeth).  Cut the cherry tomatoes in halves and then add to the pan and leave for another 5 minutes.  Now add the balsamic vinegar and the red wine and allow to cook for a further 5 minutes.  IMG_5414

Finally add the stock cube, the tin of chopped tomatoes, the baked beans and the cannellini beans.  I would also add the water at this stage, as in the oven the sauce will reduce somewhat and you don’t want a dry casserole!

IMG_5415

Stack the sausages, as per the picture in your casserole dish.  This will allow the sauce to get in between the sausages and allow everything to mingle nicely together.  To this add the casserole sauce, and if there are any sausage juices on the plate where the sausages have been resting, put these into the casserole and mix a little.  It should look a little bit like this now…

IMG_5416

Cover this with tin-foil and bake in the oven at 180 degrees for an hour.  If you want a jacket potato wrap this in foil and put this in the oven now too. For the last 30 minutes remove the tinfoil, reduce the heat in the oven to about 140/150 degrees and allow some of the liquid to evaporate off.  The sauce will become all sticky and gooey in this time and become extra tasty.  Now you are ready to serve – with the carbohydrate of your choice.  YUMMY.

photo-3

The final casserole… all scrummy and ready to eat. It may look like an ordinary casserole, but believe me it’s a taste sensation. THANK YOU ANNA BUTTERY xxx

HAPPY BIRTHDAY to ME… It’s my birthday MONTH… so let’s eat cake & celebrate!

15 May

IMG_5335This month is my birthday month… so it’s only right to celebrate with cakes and lots of them.  All my friends will testify that I am the baker and for everyone’s birthday I always provide a cake.  I love making them, giving them and generally spreading the LOVE.  Which neatly takes me onto the cakes I made last night for the girls.  I decided (on getting home from work) that I would just quickly rustle something up and 45 minutes later (including decoration time) the cakes were made… and they tasted scrummy!

In true ‘gemsfoodgems’ style I decided to make these cakes healthier than just a normal sponge cake/cupcake, so I rifled through the baking cupboard (yes we have one of these in our house) and decided to change my normal recipe for this one… (see below).  The dark brown sugar gives quite a ‘fruity’, ‘rich’ taste and the wholemeal flour increases the fibre content but also makes it a slightly less ‘airy’ sponge.  Its a little more doughy and it tastes luxurious.

I then went to town on the decoration with a block of regal icing, some white chocolate icing tubes and some coloured sprinkles and (without blowing my own trumpet) I created a little bit of a masterpiece…

… quick, simple, pretty, yummy cakes.  What more could a girl want?

MAKES: 12 small buns

PREPARATION TIME:

  • 5 minutes to make the cake mixture.
  • 30 minutes to decorate the cakes, depending on how elaborate you want the cakes to look.

COOKING TIME: 15 minutes

INGREDIENTS:

For the cakes…

  • 100g margarine
  • 100g dark brown muscavado sugar
  • 2 free range eggs
  • 50g plain self raising flour
  • 50g self raising wholemeal flour
  • 12 cake/bun cases

For the decoration…

  • 100g ready-to-roll regal icing
  • 10 – 15 drops pink food colouring
  • 1 tube of white chocolate icing (or any icing tube you have)
  • 1 pot of multi-coloured sprinkles
  • 1 love heart stencil/cutter (or you can freehand like I did)

HOW TO MAKE THE CAKES…

Preheat the oven to 180 degrees / gas mark 4 and place the cake cases in a small bun tray – they are about half the size of a muffin case/muffin tray.

First cream together the margarine and the dark brown muscavado sugar in a large bowl.

Next break the 2 eggs into the margarine and sugar and mix together well.

Sieve the white flour and the wholemeal flour into the mix and stir in until there are no lumps of flour left.  You will need to stir right down to the base of the bowl, to ensure that you have got all the flour mixed in.

Place a dessert spoon size of mixture into each cake case and then bake in the oven for 15 minutes.  Insert a knife/skewer into the cake and if it comes out clean then the cakes are cooked.  If not pop them back into the oven for 2 – 3 minutes and test again.  Carefully remove the buns/cakes from the tray and place on a baking tray to cool.

Whilst the cakes cook, you can start preparing the decorations.  Cut approx. 100g of icing off the block of regal icing, cling-film the rest tightly and you can save this for another baking day.  Add 10 – 15 drops of food colouring (start with 10 first) and then start folding the icing over the colouring using your fingers until it is all mixed in.  The colouring/icing will start to marble at first but just carry on.  If the colour is as dark as you want it then fine, if not add some more colouring and continue.

Your hands may be warm and starting to feel a little sticky.  The ONLY thing to stop this is cornflour, so sprinkle some of this over your worktop/table and rub some into your hands.

Place the ball of coloured icing in the centre of your workspace and cover with a little cornflour, turn over and repeat.  Rub cornflour all over your rolling pin and then gently begin to roll the icing.  Roll 3 times and then turn 90 degrees – this will keep the icing loose and prevent it from sticking.  You will also need to keep rubbing cornflour underneath the icing to ensure that it isn’t sticking, so do this each time you turn it.

Personally I don’t like extremely thick layers of icing, especially not on such a small cake (its also pure sugar, so its not exactly healthy!) so roll the icing out until it is about 3mm thick.  If you want to copy my patterns, then use this love heart below (print out the stencil) and cut it out the gently place on the icing and using a sharp knife cut around the template.

heartpattern

Perfect sized love heart for the top of your little bun/cake.  Print this off, cut around it and use it as your template.

Once you have cut out the love heart shape, gently free and place to one side.  Make 12 of these and then once the cakes are cooled you can get creative and start decorating your cakes.  So, squeeze a pea sized amount of the white chocolate icing, from the tube onto the top of your cake and then place the love heart on top of this.  Then you can use the white chocolate icing and sprinkles to decorate as you please.  These are some of the designs I made…

cake2

Use the white chocolate icing to make a little ‘u’ shape in the corner of the love heart, following the outline of the love heart and then sprinkle lots of sprinkles across the top, then pour the rest off, back into the pot.

IMG_5338

Follow the outline of the love heart, about 5mm in from the edge with the white chocolate icing. Place sprinkles all over the top (a lot of them) and then pour back into the pot.

IMG_5335

You could write some letters using the white chocolate icing. I wrote the word LOVE and then apply the sprinkles and shake off, back into the pot.

IMG_5336

You could even stray of the love heart path and make something else, like this bow. Its simple and easy… you need 2 tails, one bow shape and one thin piece to put in the centre. Done. Glue onto the cake with the white chocolate icing and then you can decorate with icing and sprinkles as you like!

The most important stage of all though is in the eating… so give to your family and friends.  Impress them with your skills and ENJOY eating your cakes, with love and birthday greetings from gemsfoodgems.

cake

HOW WILL YOU EAT YOURS?