Tag Archives: #breakfast

Good morning my little SAUSAGE & EGG McMUFFIN… I’m going to EAT YOU!

1 Dec

20131117-121150.jpgSo… most of my mornings start with ‘morning, what would you like for breakfast… lunch… dinner’.  My whole day revolves around my meal times and I love to plan my meals – not only does this help me save a little money but it prepares me for my day ahead.

My normal weekend breakfasts generally HAVE to include an egg somewhere.  I love eggs… mainly scrambled, with lurpack butter on top of  an English Muffin – and for those that know me well they will know that this is my standard Saturday/Sunday morning treat.

When asking this question a couple of weeks ago the response was a SAUSAGE & EGG McMUFFIN.  To be honest I was a little horrified this a) meant I would have to get up, get dressed, get in the car and head to a fast food restaurant, b) eat breakfast from a fast food restaurant and c) i’ve never had a sausage and egg mcmuffin and I wasn’t sure it was really what I desired for my breakfast treat.

This is where ‘comprimise’ is required and after a little discussion and working out what was in the cupboard (or what extra was required from the local store), it was agreed that it would be MUCH tastier to try and make our own, and so we embarked on creating our very own, up market, homemade, delicious SAUSAGE & EGG McMUFFINS.  They were unbeilveably tasty, the best breakfast I have had in a very long time. WOW.  So… here is how to make them yourself.

PREPARATION TIME: 15 minutes

COOKING TIME: 15 minutes

MAKES: 4 McMuffins

INGREDIENTS for the sausage burgers…

  • 8 linconshire sausages
  • Plain flour

INGREDIENTS for the potato rosti’s….

  • 1 large potato
  • 1 egg
  • 2 heaped tablespoons of plain flour
  • salt
  • black pepper

INGREDIENTS for the poached eggs…

  • 1 pan full of boiled water
  • 2 tablespoons of vinegar
  • 4 eggs

INGREDIENTS for the muffins..

  • 4 English Muffins
  • Lurpack Butter
  • 4 slices of burger cheese

HOW TO MAKE THE AMAZING McMUFFINS

The first thing that you need to do is to make the potato rosti’s as these take the longest to cook.  I was told that a Sausage & Egg McMuffin should always be purchased with a hashbrown, but we didn’t have any hashbrowns and I really wanted to make everything, so I decided on potato rosti’s.  They did not disappoint.

Peel the potato and discard of the skins.  The grate all the potato on the largest grater, place all of this in bowl and then you need to squeeze out the liquid before you can start adding all your other ingredients.  So take a handful of the grated potato and over another bowl squeeze this together quite hard using your hands, lots of liquid will come out of the potato.  When you cannot get anymore liquid out place this to one side and continue until you have done this to all of the potato and then throw away the liquid.  If there is too much liquid in the potato then they will just be a soggy mash potato, not a rosti!

20131117-113514.jpg

Stage 1 – grate all the potato, without the skins.

20131117-113528.jpg

Stage 2 – squeeze out all of the liquid from the grated potato and then throw this away.

Now you can add the egg, the flour, salt and pepper to the potato and mix all of this together…

20131117-120757.jpg

Stage 3 – add the flour, egg, salt and pepper and then mix well until all combined.

Place a frying pan on a low heat and add a little olive oil to the pan.  Heat until smoking slightly.  Now it is time to get MESSY!  So, using your hands take a handful of the rosti mixture and roll into a bowl.  Place into the frying pan and then repeat until you have 4 rosti’s in the pan.  Using a spatula flatten the rosti’s so you have 4 rounds that will fit into your mcmuffins.  They should look a little like this…

20131117-120817.jpg

Stage 4 – The rosti’s rounds cooking, flatten them gently using a spatula.

The rosti’s will need to be turned over every minute or so that they don’t burn.  Once they are golden brown, they can be transferred to an oven tray and place on 200 degrees, for about 15 minutes, so that the potato cooks through.  When they are cooked they should look a little like this…

20131117-121110.jpg

FINALLY – the rosti’s are cooked and ready to be placed in the mcmuffin tower.

Now we need to make the sausage burgers.  This is really easy to do.  Take the linconshire sausages, taken them out of their skins and then roll together 2 of the sausages (without skins) into a pattie shape.  Use flour on your hands and on the sausage meat to stop them sticking to you and making a big mess!  We didn’t do this at first and could NOT get the sausage meet off our hands.  Again, heat a little oil in a frying pan and add the sausage burgers to the pan and cook until golden…

20131117-120906.jpg

Sausages, flour for your hands and scisors to remove the sausage skins.

20131117-121003.jpg

Keep turning every few minutes until the burgers are golden brown.

There are now only a few things left to do, one of the most important though is to poach the eggs.  So take a large pan, add boiled water and then keep on a low heat.  To this add 2 tablespoons of vinegar and then leave to boil/bubble – but only a little.  Break an egg into a cup and then holding this in one hand, create a ‘vortex’ in the water with a spoon and into the middle of this gently place the egg.  The cup will allow you to get the egg close to the water and drop it in all at once without it going in in little bits!  The swirling water will bring all the egg together and create the perfect poached egg.

20131117-121020.jpg

My perfect poached egg…

Take this out of the water using a slotted spoon and then place to one side – on a plate and then cook the other poached egg.  A few minutes before serving place all the eggs in the water to heat through.

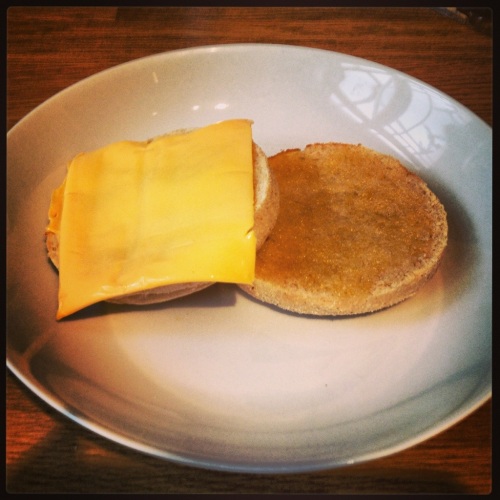
Last, but certainly not least, you need to prepare the muffins, so take slice them in half, toast them lightly, spead a layer of Lurpack butter onto them and then place the cheese on, so that this melts…

20131117-120933.jpg

Toasted muffins with butter and cheese on… yum!

Now you can build your SAUSAGE & EGG McMUFFIN and then it is time to eat!  Here we go… rosti on top of the cheese, followed by the burger, followed by the poached egg and then top with the muffin lid!  NOW IT IS TIME TO EAT the McMuffin.. ENJOY!!  (I tell you it is well worth the preparation time and the cooking time and it is a total treat!)

20131117-121150.jpg

20131117-121210.jpg

BREAKFAST is served!!

20131117-121225.jpg

How amazing does this look when it is sliced through!? WOW!

20131117-121250.jpg

ALL GONE!


Nigella for breakfast anyone? Oh sorry… I mean a NIGELLA RECIPE MASH UP – Eggy Cinnamon Bread with Jam

30 May

20130529-071711.jpgTo say May has been a busy month would be a slight understatement! I have had family visiting for birthday adventures as well as friends each and every weekend. Although I would change nothing about the last few weeks, I do (after a while) start to run out of ideas of what to feed people as I start to become bored of the same repertoire – eggs and bacon every morning for breakfast. Now I fully understand that this is a ‘classic ‘ not to be messed with and certainly not a dislike, but there is only so much cholesterol one person should consume in a weekend.

Consequently I did a ‘Gemma’ and started to search around for something new… I knew I wanted to make some eggy bread as I love it, but I wasn’t sure how to vamp it up. Luckily Nigella had the inspiration I required and I started to play around with her recipe to create this little gem…

PREPARATION TIME: 5 minutes

COOKING TIME: 15 minutes

MAKES: 4 portions

INGREDIENTS:

  • 3 eggs
  • 40ml full fat milk
  • 40ml single cream
  • 4 tsp cinnamon
  • 1 nutmeg pod/seed and a grater/zester
  • 3 tsp icing sugar
  • 6 slices of stale bread – white or brown is fine, but obviously brown is best as it is healthier than white
  • 1/2 punnet of raspberries
  • 2 tbsp sugar

HOW TO MAKE THESE LITTLE GEMS…

We start by breaking 3 eggs into a measuring jug. To this add the milk and the cream and whisk well. You may be using your only measuring jug, if so, place this with the eggs in, onto your weighing scales and ‘zero’ them. Now you can pour in 40g or milk and 40g of cream. This is because ml and g are virtually the same – one is a millilitre, a measure of the volume of a liquid and the other is a gram which is a weight. Try measuring 10ml and then weighing this 10ml in grams. I promise you it will be the same….

20130529-073709.jpg

Next add the cinnamon and the icing sugar and whisk again. Now you can pour this mixture onto a plate ready to dip the eggy bread in.

20130529-073849.jpg

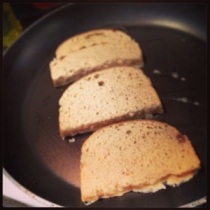
Cut the stale bread into half slices and then dip into the eggy mixture, allow to soak on one side for 30 seconds and then turn the bread over and allow to soak for 30 seconds. When the bread is completely eggy and gooey, you can pop it into a warm/hot frying pan do not use any oil (you just don’t need it) and cook for a couple of minutes (until the bread turns golden).

20130529-074302.jpg

Eggy cinnamon bread laid out in the frying pan, cooking on one side…

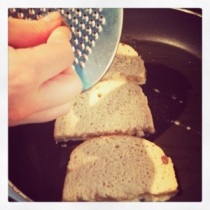
If you like nutmeg, this would be the time to grate a little nutmeg on the top of the eggy bread… Whilst one side is uncooked. Just use a little nutmeg, as eating nutmeg is toxic and eating a lot of this could be harmful to your health – especially for pregnant women.

20130529-074538.jpg

Grate the nutmeg onto the uncooked/eggy side of the bread before turning over.

Once the bread is cooked, and has turned golden on one side, turn over and repeat on the other side. Your bread should now look like this…

20130529-074441.jpg

… beautiful, golden eggy cinnamon bread!

Depending on how much eggy cinnamon bread you are making, it’s going to be best to do them in batches and keep the cooked batches warm. So place the cooked eggy cinnamon breads on a plate or baking tray and place in the oven on a low heat – approx 50 degrees will be fine.

HOW TO MAKE THE JAM…

In a large pan place the punnet of washed raspberries, to this add 1 tbsp of sugar. Cook this on quite a high heat for about 5 – 10 minutes, or until the sugar dissolves, the raspberries break up and the juice reduces a little bit. Place in a mug/jug/cup and serve on the side of your eggy cinnamon bread. Place the other 1 tbsp of sugar in a cup and allow your breakfast guests to sprinkle over there eggy cinnamon bread! YUM!

20130530-073105.jpg

Serve and ENJOY!

Alternatively you could serve the raspberries cold on the side of the dish and sprinkle over a little sugar. The choice is yours.

Alternatively (take 2) you could use a different fruit such as blueberries, blackberries, strawberries, cranberries or gooseberries!  You could use a selection of these, or just one or you could mix it up and use a different one each time you make this dish… it’s exciting isn’t it!

Most of all, enjoy your breakfast/brunch and ensure you get lots of praise and thanks from your dinner guests.

WASTE not, WANT not… Lets make magic with our HOT CROSS BUNS!

3 Apr

20130402-211433.jpgMy mummy always taught me ‘waste not, want not’.  So, I didn’t and generally I don’t.  I make sure I eat everything that is on my dinner plate and if I have leftovers they make fabulous little lunches for the week.

I got home from work this evening, hoping to freeze my hot cross buns and was a little disappointed to find some of them were really quite stale (and I was running out of freezer room), so I had a new idea.  I decided to make them into dessert.  A bread and butter pudding style dessert.  Here we go!

PREPARATION TIME:  10 minutes

COOKING TIME:  30 minutes

MAKES: 2 portions

INGREDIENTS:

  • 2 stale hot cross buns
  • 4 tsp of raisins/cranberries/sultanas
  • 2 egg yolks
  • 10 fl oz of semi skimmed milk
  • 1/2 tsp vanilla essence

HOW TO MAKE THE BREAD & BUTTER PUDDING…

20130402-211340.jpgTake a oven proof dish and your 2 hot cross buns and break the hot cross buns up, into lots of smaller pieces (about 1cm to 2cm), you don’t want this pudding to be neat and even.  The more rustic the better.

20130402-211257.jpg

To the broken up hot cross buns add your dried fruits.  Make sure this is scattered well and poked in all the little holes!

20130402-211247.jpg

Finally you can make the custard.  So, in a bowl place the 2 egg yolks (only, no egg white) and then your sugar and vanilla – mix these together well.  Place the milk in a pan and heat gently until it comes to the boil.  Once the milk has boiled, pour this into the bowl with the egg, sugar and vanilla and whisk constantly.  Once the mixture has combined pour this back into the pan and heat gently.  Stir constantly and after 5 – 6 minutes you will have custard!

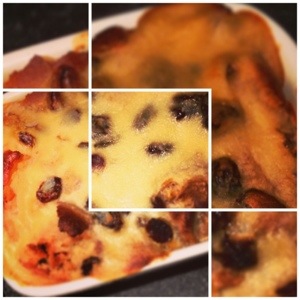
Pour the custard over the broken up, hot cross bun and the raisins and then bake this in the oven on 180 degrees / gas mark 5 for 30 minutes – or until golden in colour.

You can eat this straight away – whilst it’s hot.  But you really should share it with at least one other person!

HOT CROSS BUNS… with a *CRANBERRY* surprise… {mixing it up}

29 Mar

IMG_4724[1]For the last week I have been pondering what to do with my next batch of HOT CROSS BUNS to make them different from my last batch and to deliver something to you (… my friendly audience) that will be a treat, something extraordinary.

My inspiration came when I was treated to the ‘BOSTON BROWNIE’ from Konditor & Cook in Borough Market.  It was a true taste sensation – so much so, that I (gemsfoodgems@twitter) had to tweet a thank you!

The secret, making these brownies a real taste sensation was the addition of cranberries.  Yes, seriously – little explosions of fruit flavour in the middle of a heavenly, luxurious, chocolate brownie.  My brain started whirring and I thought… cranberry, orange zest… in my hot cross buns… THAT’S IT.

Without further ado, I present to you my CRANBERRY & ORANGE HOT CROSS BUNS.

PREPARATION TIME: 2 hours (including the proving time and time to make the shortcrust pastry)

COOKING TIME: 20 minutes

MAKES: 12 Cranberry & Orange Hot Cross Buns

INGREDIENTS:

For the Bread Buns

  • 250g strong white bread flour
  • 250g strong wholemeal bread flour
  • 60g light brown muscavado sugar
  • 1 x 7g sachet fast-action dried yeast
  • 1/2 tsp salt
  • 1 tsp mixed spices
  • 1 tsp cinnamon
  • 1/2 teaspoon nutmeg
  • zest of 1 large orange
  • 140ml luke-warm semi-skimmed milk
  • 130ml luke-warm water
  • 60g butter (melted and cooled slightly)
  • 1 large free-range egg (approx. 90g)
  • 100g raisins or currants (without seeds)
  • 60g dried cranberries

Shortcrust Pastry

  • 30g plain flour
  • 15g butter
  • water (cold, enough to bind together)

Sugar Glaze

  •  2 tbsp caster sugar
  • 2 tbsp water

HOW TO MAKE YOUR EASTER TREATS…

To make the bread buns…IMG_4725[1]

♥ Sift the flour into a large bowl, stir in  the sugar, yeast, salt, mixed spice, cinnamon and nutmeg, and make a well in  the middle.

♥ Mix together the warm milk and water and add to the bowl with the melted and cooled butter, together with the whisked egg.

♥ Mix to a soft dough using a metal spoon.

♥ Knead the dough on a  lightly floured surface until smooth and elastic.  You will know when it is ready when the dough ‘springs back’, so shape into a ball, gently push your finger in about 1/2 a cm, then take it out – if the dough ‘springs back’ it is well kneaded – if not knead some more!IMG_4726[1]

♥ Shape the dough into a round and then place in a large bowl.  Cover with a clean tea towel and leave to rise in a warm  place for 1-1½ hours or until the dough has doubled in size.

♥ Remove the dough from the bowl and ‘knock back’ using your fists – this removes all the air.

♥ Knead the dough on a lightly floured surface for 2-3 minutes  until smooth and elastic once again.

♥ Now add the orange zest, currants and the dried cranberries and knead for a minute until all the fruit is mixed into the dough.

♥  Divide the dough into 12 pieces and shape into small  rolls.

♥ Perfect bun, now lets make the shortcrust pastry crosses!

To make the crosses…buns 3

I would make the shortcrust pastry whilst the dough proves.  Then you can wrap it in cling-film and keep it in the fridge until you need to use it.

Then…

♥ Roll out the shortcrust pastry to 5mm narrow strips – as you have 12 buns you are going to need 24 strands.

♥ Place one strip across the top of one of the bus, then place the other across this, to make a cross.  Press down lightly and if required, secure  with a little water and a pastry brush.  If you want to go a little crazy (like me) you could make some ‘shapes’ and place these on top – I have (as you can see) created little love hearts…buns6

♥ Lightly oil 2 baking trays, arrange the buns on the  trays and cover with oiled cling-film.

♥ Leave to rise in a warm place for 30  minutes or until doubled in size. Remove cling-film – it’s time to bake the buns!

♥ Bake buns in a  preheated oven at 220 degrees C / Gas Mark 6 for 20 minutes (or until golden brown).

♥ Transfer the buns to a wire rack.

To make the glaze…

♥ Heat the sugar and water in a pan, until the sugar dissolves.  Do not let the sugar/water burn or begin to caramelise.  Make this whilst the buns cook.

♥  When you take the buns out of the oven and place them on the wire rack, you can brush them with the glaze and then serve warm or cold.

♥ If you let them cool, you can slice in half the next morning, toast and serve with a little butter!  YUM!

Baked, glazed and ready to eat! MARVELLOUS!

Baked, glazed and ready to eat! MARVELLOUS!

STORAGE:

The sugar glaze on these buns can make them go quite soggy, quite quickly and as they are fresh, with no preservatives the inside of the homemade hot cross bun can begin to go stale/dry quite quickly.  So, eat one or two fresh and store 2 or 3 in a large cake tin.  With the rest, chop them in half, put them in freezer bags and place them in the freezer for another day.

You know the days where its hard to get out of bed and there has to be something super special to make you get up and give you the start your day need.  I think these may just be that ‘kick start’.

HAPPY EASTER!

[SINGING] HOT CROSS BUNS, hot cross buns, one a penny, two a penny, hot cross buns!

26 Mar

hot cross bunsIt is nearly Easter – which not only means that we get a 4 day weekend (wooo!), but also that we get to eat many HOT CROSS BUNS, Easter eggs, chocolate filled rabbits and the like!  Yum!

For me, Easter is a real treat in terms of my breakfast time habits.  I stop eating toast and/or porridge for a week (or two) and I treat myself to some delicious toasted Hot Cross Buns with butter each morning.

A couple of years ago my Nanna, who was a truly wonderful lady passed away.  She taught my mum all she knows about cooking and baking, who in turn taught me, so we decided to start a yearly tradition of making these Hot Cross Buns together; in time for Easter.  Hot Cross Buns are also something I vividly remember eating in a little cafe with my Nanna when she was looking after me.  We would go to town to get some shopping and treat ourselves to a toasted Hot Cross Bun with butter – just half each mind!  I loved it, and when I eat them now it takes me right back to the little cafe in the North.  There really is nothing like a ‘food memory’.

So, last time I headed to the North, my mother and I decided to take the opportunity to make some homemade Hot Cross Buns.  My mum (SallyAnn) is the proud owner of a ‘Mary Berry’ cook book, so this year we decided to try out her basic recipe – with a few of our own, family additions.

PREPARATION TIME: 2 hours (including the proving time and time to make the shortcrust pastry)

COOKING TIME: 20 minutes

MAKES: 12 Hot Cross Buns

INGREDIENTS:

For the Bread Buns

  • 250g strong white bread flour
  • 250g strong wholemeal bread flour
  • 60g light brown muscavado sugar
  • 1 x 7g sachet fast-action dried yeast
  • 1 tsp salt
  • 1 tsp mixed spices
  • 1 tsp cinnamon
  • 1/2 teaspoon nutmeg
  • 140ml luke-warm semi-skimmed milk
  • 140ml luke-warm water
  • 60g butter (melted and cooled slightly)
  • 1 large free-range egg (approx. 90g)
  • 120g sultanas/raisins or currants (without seeds)
  • 40g chopped apricots (optiona – if you don’t want to use these, use more currants/raisins)

Shortcrust Pastry Crosses

  • 50g plain flour
  • 25g butter
  • water (cold, enough to bind together)

Sugar Glaze

  •  2 tbsp caster sugar
  • 2 tbsp water

HOW TO MAKE YOUR EASTER TREATS…

To make the bread buns…

The kneaded dough, without any fruit.  These needs to be left to rise and double in size.

1. The kneaded dough, without any fruit. These needs to be left to rise and double in size.

♥ Sift the flour into a large bowl, stir in  the sugar, yeast, salt, mixed spice, cinnamon and nutmeg, and make a well in  the middle.

♥ Mix together the warm milk and water and add to the bowl with the melted and cooled butter, together with the whisked egg.

♥ Mix to a soft dough using a metal spoon.

♥ Knead the dough on a  lightly floured surface until smooth and elastic.  You will know when it is ready when the dough ‘springs back’, so shape into a ball, gently push your finger in about 1/2 a cm, then take it out – if the dough ‘springs back’ it is well kneaded – if not knead some more!

Dough split into 12 and rolled into small rolls, with the fruit added. Yum!

Dough split into 12 and rolled into small rolls, with the fruit added. Yum!

♥ Shape the dough into a round and then place in a large bowl.  Cover with a clean tea towel and leave to rise in a warm  place for 1-1½ hours or until the dough has doubled in size.

♥ Remove the dough from the bowl and ‘knock back’ using your fists – this removes all the air.

♥ Knead the dough on a lightly floured surface for 2-3 minutes  until smooth and elastic once again.

♥ Now add the currants and the apricots and knead for a minute until all the fruit is mixed into the dough.

♥  Divide the dough into 12 pieces and shape into small  rolls.

Perfect bun, with the shortcrust pastry cross.

Perfect bun, with the shortcrust pastry cross.

To make the crosses…

I would make the shortcrust pastry whilst the dough proves.  Then you can wrap it in cling-film and keep it in the fridge until you need to use it. Then…

♥ Roll out the shortcrust pastry to 5mm narrow strips – as you have 12 buns you are going to need 24 strands.

♥ Place one strip across the top of one of the bus, then place the other across this, to make a cross.  Press down lightly and if required, secure  with a little water and a pastry brush.

♥ Lightly oil 2 baking trays, arrange the buns on the  trays and cover with oiled cling-film.

♥ Leave to rise in a warm place for 30  minutes or until doubled in size. Remove cling-film – it’s time to bake the buns!

♥ Bake buns in a  preheated oven at 220 degrees C / Gas Mark 6 for 20 minutes (or until golden brown).

♥ Transfer the buns to a wire rack.

To make the glaze…

♥ Heat the sugar and water in a pan, until the sugar dissolves.  Do not let the sugar/water burn or begin to caramelise.  Make this whilst the buns cook.

♥  When you take the buns out of the oven and place them on the wire rack, you can brush them with the glaze and then serve warm or cold.

♥ If you let them cool, you can slice in half the next morning, toast and serve with a little butter!  YUM!

Hot Cross Bun - baked, with cross and glazed with the sugar and water.  Stunning!

Hot Cross Bun – baked, with cross and glazed with the sugar and water. Yum!

STORAGE:

The sugar glaze on these buns can make them go quite soggy, quite quickly and as they are fresh, with no preservatives the inside of the homemade hot cross bun can begin to go stale/dry quite quickly.  So, eat one or two fresh and store 2 or 3 in a large cake tin.  With the rest, chop them in half, put them in freezer bags and place them in the freezer for another day.

You know the days where its hard to get out of bed and there has to be something super special to make you get up and give you the start your day need.  I think these may just be that ‘kick start’.

Hats off to Lorraine for these RASPBERRY MUFFINS.

7 Feb

raspberry muffin

Now that January is done I think we can all indulge a little again without feeling too guilty.  So, this week I decided to make some of my favorite little muffins, courtesy of Lorraine Pascale.  Now I don’t want to steal her thunder or destroy her recipe, but I decided to make a slightly healthier version of these muffins (following Lorraine’s basic recipe) and they worked.  If you look at the normal recipe and then at my version here you will see the reductions quite clearly, so I won’t write all the differences out, but basically I will be reducing the sugar, reducing the butter, using some wholemeal flour, reducing the volume of each muffin and amending the baking times.  Here we go…

Makes: 16 muffins

Preparation time: 15 minutes

Cooking time: 25 minutes

Ingredients:

  • 150g wholemeal self-raising flour
  • 200g plain self-raising flour
  • 1 tsp baking powder
  • 2 tsp ground cinnamon
  • 175g soft light brown sugar
  • 350ml semi-skimmed milk
  • 2 eggs
  • 100g butter, melted and cooled
  • 1 punet of raspberries (fresh or frozen)

Method:

Prepare your muffin tray with muffin cases and then preheat the oven to 180 degrees (gas mark 5).

These muffins are so easy to make, so get your large bowl, weighing scales and teaspoon at the ready and then measure out the flour, baking powder and cinnamon and sieve into the large bowl.  To this add the sugar and mix well.

To the dry ingredients add the wet ingredients i.e. the eggs, the milk and the melted (and then cooled) butter.  Slowly mix all these ingredients together until they form a lovely batter.  You want to make sure you mix this well and that there are no little bubbles of flour – as these will cook into the cake and when you cook them the flour bubbles will remain – yuck.

To this lovely batter add your raspberries.  If you want to wash them first (which I would recommend) then you will need to dry them off quite well in paper towels or they will become very soggy in the cake mixture and they will not taste as rasperry-ish as you want them to.

I also break all my raspberries in half, so that there are more to go around.  So, take out 16 whole raspberries, put these to one side.  Break the others in half and drop into the batter.  Mix well then pour some of the batter into a mixing jug so that you can pour the batter into the muffin cases.  You should fill these until they are approx. 4/5ths full.  I would normally do 2/3rds, but these muffins don’t rise as you would expect – this is why you can’t really spoon the mixture and need to pour it into the cases.

Next, use the raspberries you reserved and place one (you can split this if you like) onto the top of each muffin.  The muffins are now ready to bake, so place the tray in your oven for approx. 20 minutes.  They should be golden and cooked, but if not then put them in for another 5 minutes.  To check they are cooked place a knife or a skewer into the centre of the muffin and when you remove it, it should be clean.  If it has lots off mixture on then they are not cooked and need to go back into the oven.

Happy cake making people.  It is time for me to eat one with a cup of tea… ummm!!

raspberry muffin and tea